
 Paper Airplane Instructions
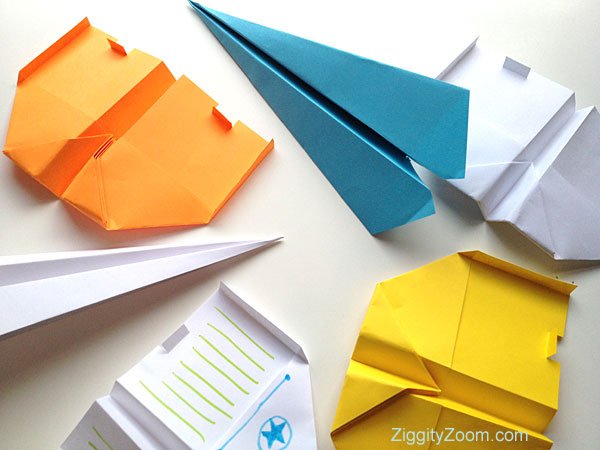
Paper airplanes have been around since forever. It’s one of those things that everyone should learn to do during their childhood. I remember my dad making paper aiplanes for us when I was a kid. And I still love making paper airplanes with my grandkids. All you need is a sheet of standard paper, 8.5×11, and you can make plain white airplanes or use colored paper. For extra detail let the kids decorate with markers. These paper airplanes are fun to fly, both indoors or outside.
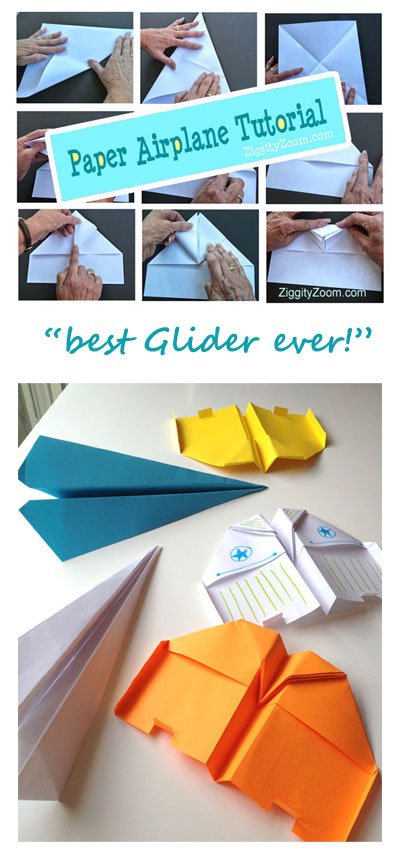
Here we provide you with a step by step photo tutorial of making the ultimate gliding paper airplane. We guarantee this plane will loop and glide, taking unexpected turns along the way.
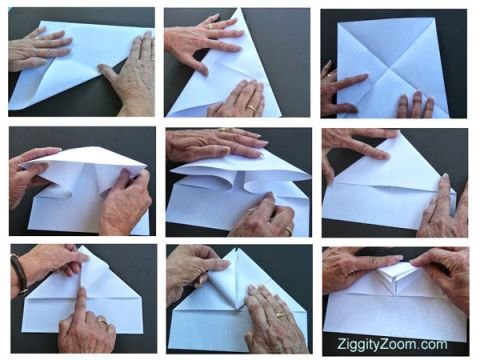

Step by step directions for making a paper airplane that is an ultimate glider.
What to Do:
- Fold the short side of the paper over to the right, even with the edge, and make a crease.
- Unfold and repeat folding to the left.
- Fold paper as shown to make a point, crease in place.
- Fold each side tip, upward, to make a point.
- Fold top point down now to meet the fold line. Crease well.
- Fold plane in half and crease. Fold each wing back, leaving 1/2 inch at the bottom and crease.
- Fold both outside edges up about 1/4″ and leave folded edge pointing upwards.
- Make two 1/4″ cuts, about 1/2″ apart, in the tail sections and fold as show in photo.
- Hold the airplane in the very front, as shown, to get a good glide going.
- Happy flying!
By Sharon Pierce McCullough for ZiggityZoom.