
Easy to Make Pirate Costume for Kids
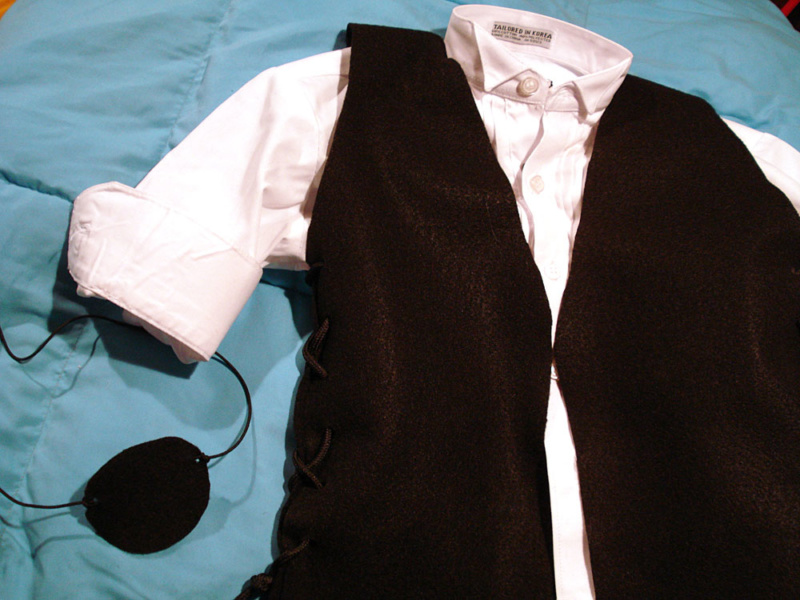
Here is an easy-to-make Pirate vest and eyepatch for your favorite little pirate. Made from felt and shoelaces, there is no sewing required to make this pirate vest. And if your little pirate want to make a fun pirate belt, instructions are also included below.
Items needed:
- Black felt material (if 36″ wide or more, 1/2 yd will work)
- One pair of Shoelaces 54″ cord-type
- Scissors
- Hole punch
- Elastic cord for eyepatch
- Chalk (optional, for marking)
Instructions:
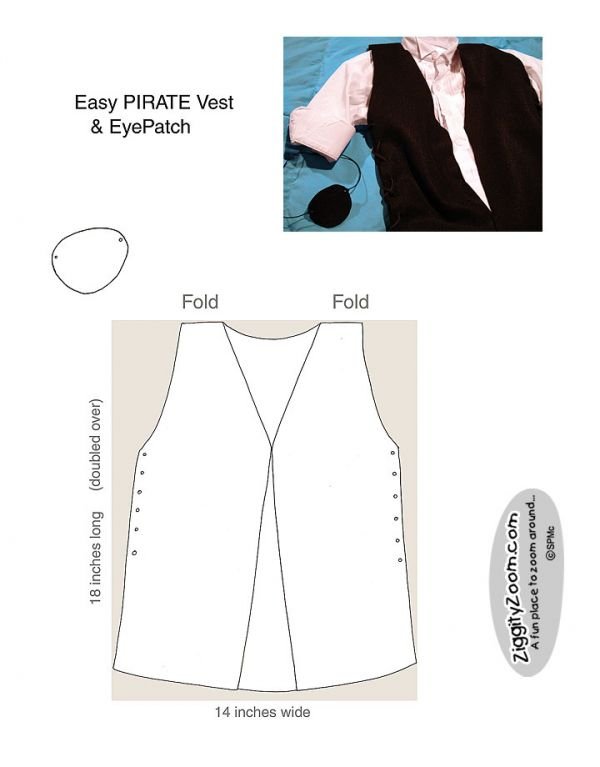
- Fold felt fabric in half, so that the length from the folded edge is 18 inches (or more if working with wider fabric).
- Note that the folded area will serve as the shoulder area, so this must not be cut.
- We started with a piece (folded) that was 14 x 18 inches, but prior to cutting your material you might need to make an adjustment in size, depending on the child. You might need to work larger or smaller, as the case may be.
- Referring to the pattern, (you may want to draw chalk lines prior to cutting) cut out area for the side of the shoulder and the side taper.
- Next … cutting ONLY the top (front) cut straight up the center front. Then cut diagonal lines, as shown, to form the front.
- Use a hole punch to make six holes (front and back) about an inch apart. Only cut one thickness of fabric at a time.
- Lace sides with a shoelace and tie off at end of lacing. Tie off ends, about even with the bottom of the vest, then cut off excess.
- Cut Eyepatch from area cut from side shoulder. Make two small holes to tie elastic cord through.
- Now your Pirate is ready to go!
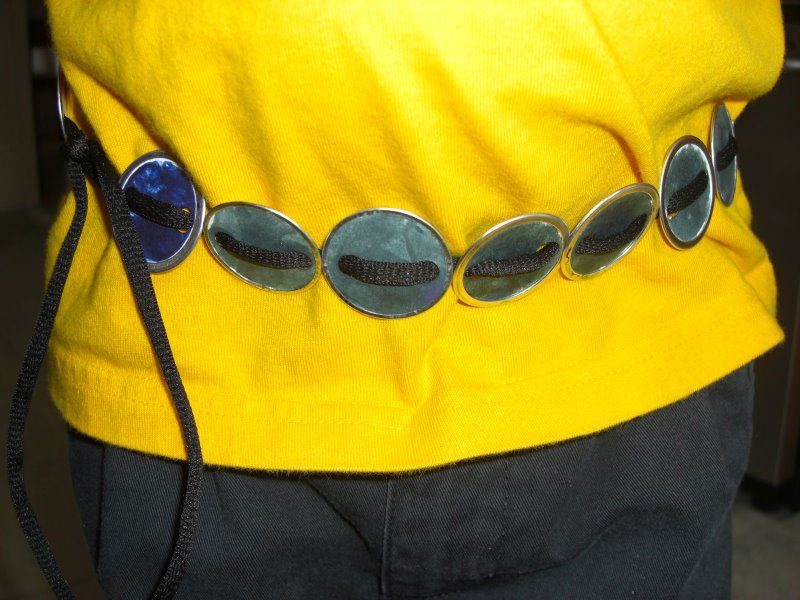
Pirate Belt
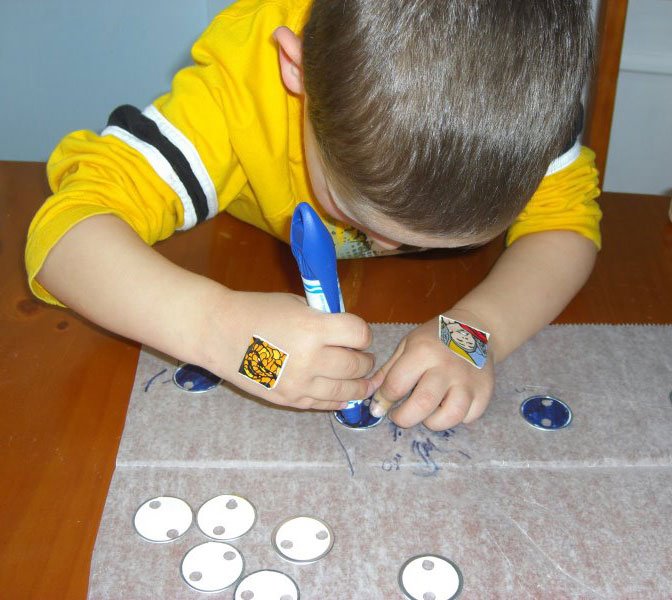
This is an easy craft for even a young Preschooler. Let them make a fun Pirate belt or make it pink and it becomes a Princess belt.
Items needed:
- Key Tags w/ metal rims
- Holepunch
- Permanent, non-toxic Markers
- Shoelace (45″)
Instructions:
- Key Tags usually have one hole already punched, so you just need to punch a hole on the opposite side. Holes should be directly across form one another.
- Color with markers. You only need to color one side but if your preschooler is really into the project, let him color both sides.
- Using just one shoelace, start threading the Tags onto the lace, one at a time. Show your child how to repeat the same “up through the bottom, down through the top” maneuver to get the tags all looking the same. But if they don’t get it, the belt will still look just great … and the child still has a great sense of acomplishment.
- Leave room at both ends so belt can be tied.