
DIY Art Easel
We have homes filled with markers, colored pencils, colorful clay, scraps of patterned paper and much more. Sharon is an artist and I am the daughter of an artist with my own blooming artist, my youngest son, Carson. While you may not have lots of art supplies, a few basics will do. Truthfully, it doesn’t take much to inspire a budding artist. To encourage your little artist, or even yourself, why not make a DIY ART Easel or create a temporary art space for the times you want to paint or draw? It is much more conducive to be creative if the supplies are readily available. That’s one of the reasons that we always take advantage of art supplies when they are on sale.
This easel is really quick and easy to make and, best of all, it is made from items most of us have around the house anyways. It can be folded up and slid behind a desk or laid flat beneath art papers til next time. You can whip up a number of these if the kids are having a party and let art be one of the fun activities. We find that if the art supplies are out when the kids have a friend over, many times it will be an activity that the kids are drawn to. Anytime you can encourage creativity is a wonderful time in our estimation!
Here are the supplies you will need to get started and the simple directions to make the Easel.
Art Easel Directions
Supplies
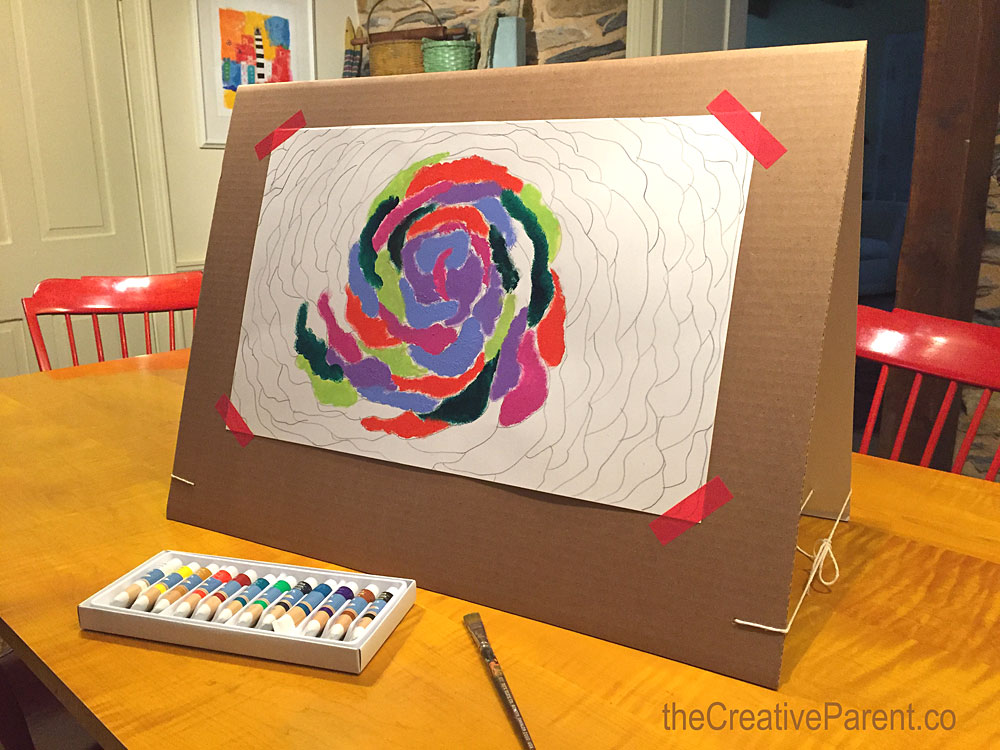
- Cardboard, 24″ x 36″ is ideal
- String, twine or grosgrain ribbon
- Ruler, pencil & scissors
- Artpaper
- Removeable tape
Directions
- As listed, our cardboard piece started as a 24″ x 36″ piece. But the measurement can vary. Basically you want a long, rectangular piece to start with since you will be folding it in half.
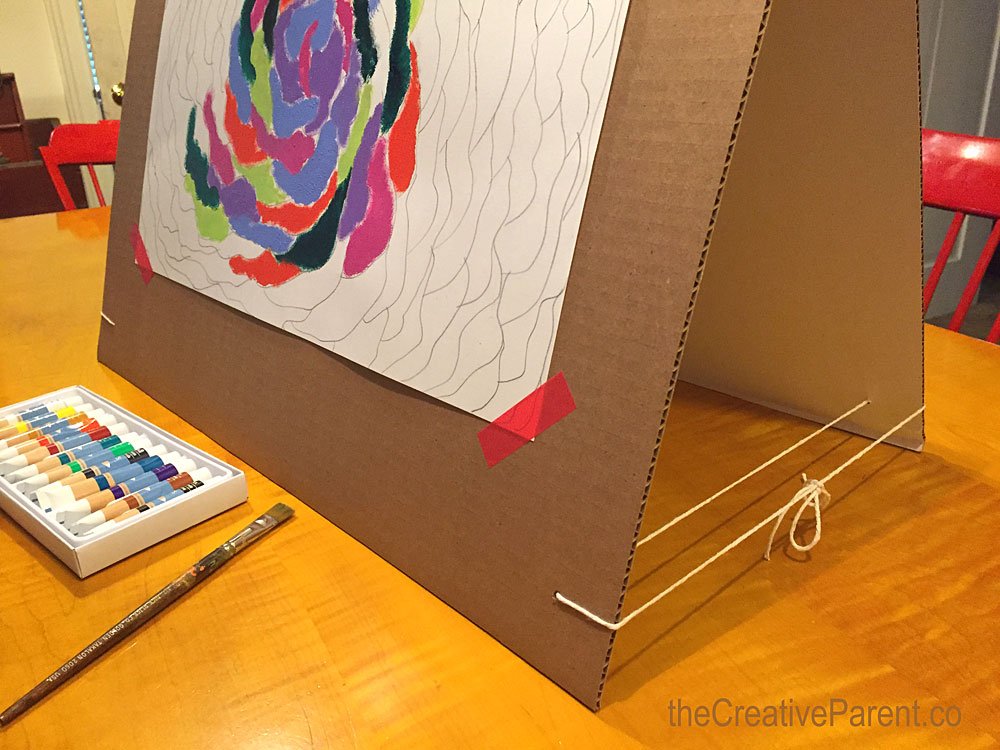
- Mark the center of your long sides and then fold in half, bending along a table edge or along a metal yardstick.
- Cut two lengths of string 36″ long.
- Make a hole, using an icepick or tip of pointed scissors, at each corner. Hole should be at about the same location for each corner and at least an inch from the edges.
- Thread the string through the front of easel and then into the back section. Tie ends on side after making a secure knot. Alternately, you can have a single string that is knotted well in both front and back.
- Leave strings in place when not in use, as the easel can be folded flat and then popped open for quick use later.
- Either painters tape or other removeable tape from a craft store will work well to keep art paper in position while working on a piece of art.
Art supplies to keep on hand for any budding artist are simple items such as pencils, erasers, color pencils, crayons, markers and a selection of art papers. Many of these can be found at dollar stores, especially for basic art materials. In addition, we like to keep a selection of colorful acrylic paints, brushes and even things like patterned tapes for multimedia projects.
