
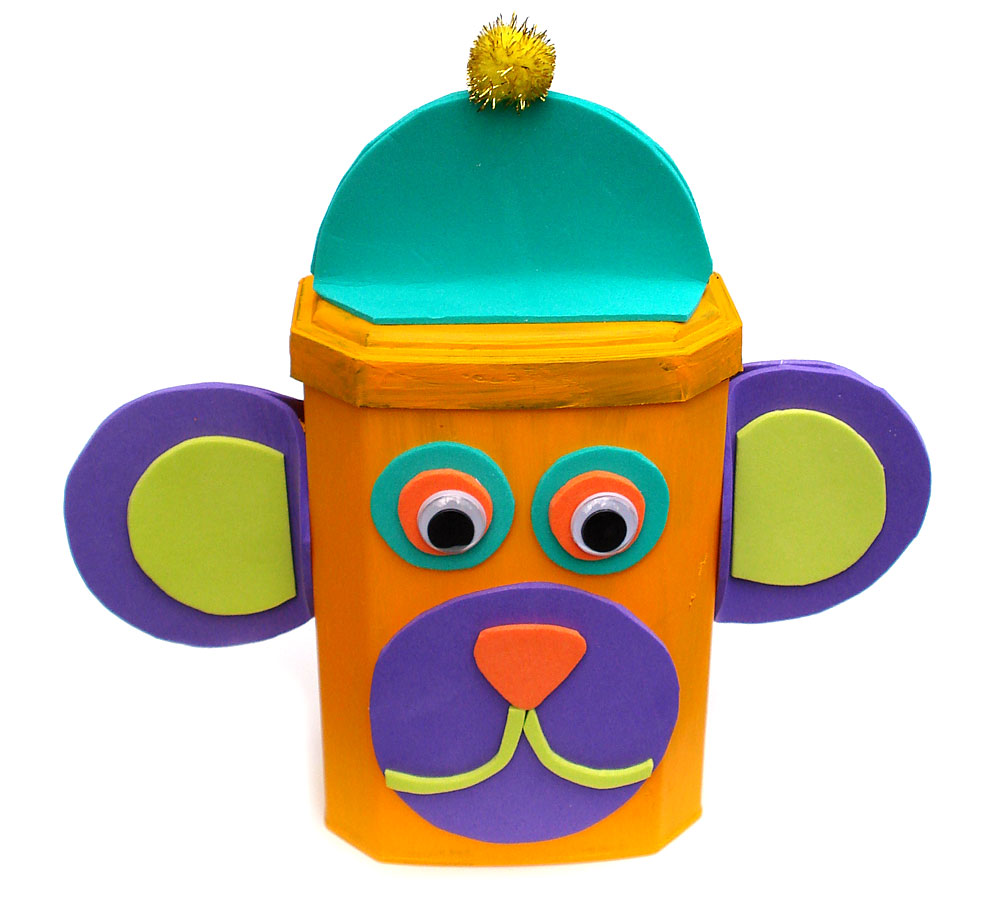
Recycled Monkey Bank Project
Encourage your child to save money by making this cute Monkey Bank together. A colorful, fun and easy art project.
Items needed:
- Plastic container with snap-on lid (yogurt container, Nestles chocolate mik container or coffee container)
- Sticky-back foam sheets
- Wiggly eyes or buttons
- Scissors
- Craft glue
- Non-toxic acrylic paints
Instructions:
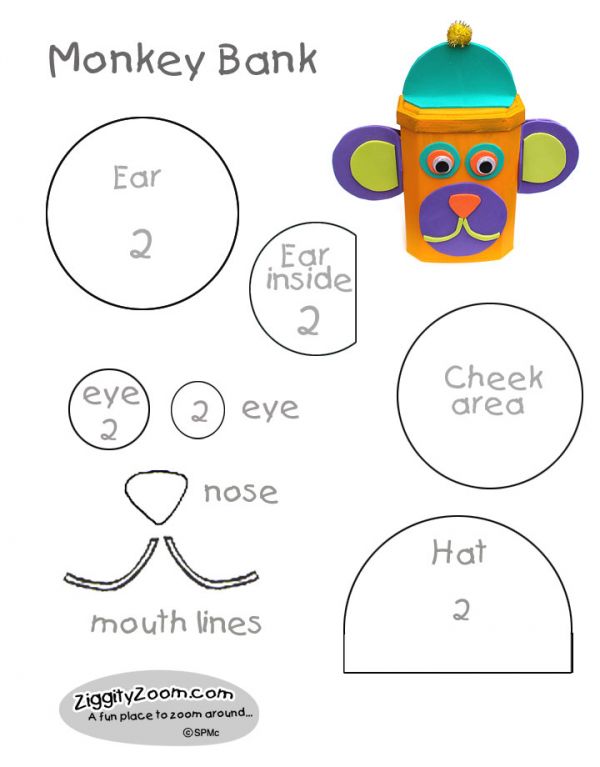
- Print pattern and directions. Or draw shapes directly onto foam sheets described below.
- Cut out patterns and trace onto paper backing of sticky-back foam. You may use regular foam sheets but will have to glue these in place. Make adjustments for the size and shape of your container.
- Cut out all pieces. Make sure you cut two of pieces indicated.
- Paint container and lid desired color and let dry thoroughly. If it isn’t completely dry before handling, the paint may scrape off. * For a more permanent coat of paint you can paint the container with gesso first.
- Peel backing from ear pieces and carefully stick the tops and middle portions together. Hold back the last inch of the ear from sticking together and then apply the ear to the side of the container. (part of the ear will attach towards the front and the other part towards the back). Repeat for second ear.
- Attach cheeky area to the face of the monkey and then apply the nose and mouth lines to this section.
- Stick the larger eye parts onto the monkey’s face and then apply the smaller eye parts.
- The hat will be made in the same way as the ears, but it will be positioned on top of the lid.
- Glue a pompom or paper ball onto the top of the beanie and then glue the eyes in place.
- Money can be put into the Monkey Bank by removing lid or PARENT can cut a slot into the lid top.