
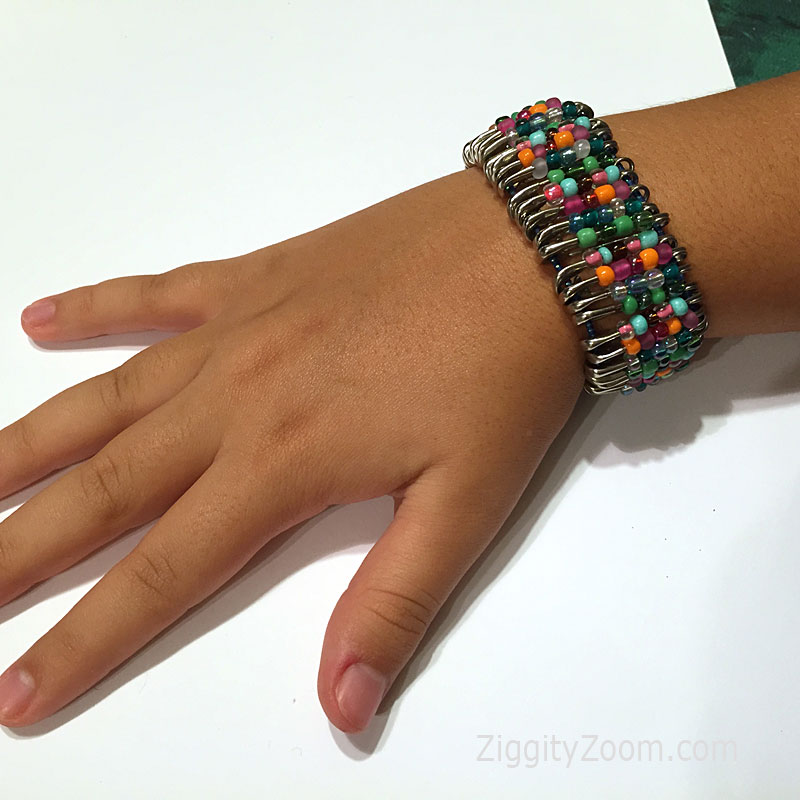
Wow, how surprised I was when my visiting granddaughter, who just turned 13, asked to make this bracelet. Why was I surprised? Well, to date, she has never been interested in frilly clothing or any type of jewelry like her younger sister. But this little safety pin and bead bracelet caught her eye. T does like things made from shells or other natural materials though, as do I. So, off we went to buy some fun colored beads and cord. I already had a tin filled with safety pins.
So even if you, your girls or friends aren’t really into jewelry, I think you will love this little bracelet craft. Not only is it fun to make for yourself but it’s a great little gift idea. And it’s a really good gift idea for tweens and teens to make for their friends.
My younger granddaughters weren’t interested in taking the time to make a whole bracelet, so they made little necklaces from just a few beaded safety pins that turned out real cute.
What You Need:
- Stretchy cord
- Colored beads
- Safety pins
- Scissors
- Needle nose pliers
What to Do:
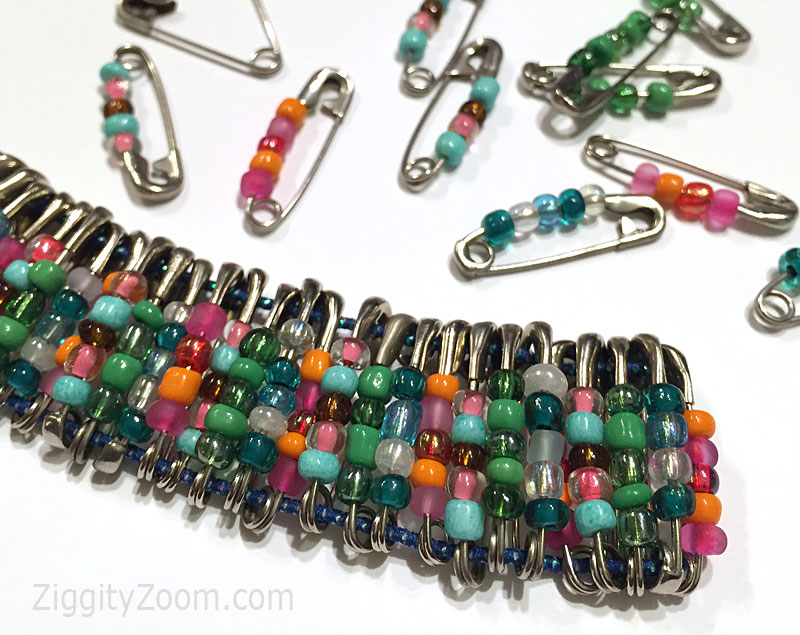
- For each safety pin, slide 5 beads of desired colors onto the pin. Depending on size of beads, you may have more or less per pin.
- After closing the pin, use needle nose pliers to crimp the end securely closed. This will ensure that your pins never accidentally open once your bracelet is completed.
- The number of beaded pins will vary depending on the size wrist of the person the bracelet is for. You can judge as you go along.
- Cut a piece of stretchy cording to about 24 inches long. This piece will actually be doubled over when you start plus you need to allow for extra to finish tying off the ends.
- Once all the pins are beaded, thread the cord through your first pin by going through one end and then out the other end. You will now have a closed end with two tails.
- Add pins, one beside the other. Note that our bracelet has all heads of pins at one side. This was done as a preference. You can also alternate heads to top, then bottom and so on.
- Keep beads towards the top as you add them.
- Once all beaded pins are threaded onto the cord, try the bracelet around your wrist. You want the bracelet to slide on by stretching a bit but you don’t want the bracelet pressing tightly again your wrist so that it causes an indentation.
- Tie the loose ends to the other side of the bracelet and tie a few times to secure the knot. You can apply a dab of white glue to the knots to ensure they don’t unravel.
