
Need an extra special fabulous activity to do with your kids on a weekend? One that will teach them a skill, give them confidence and hours of fun after its built? Then make a backyard teepee. This is one of my grandsons all-time favorite projects that we made a few summers ago.
Not only does this project encourage everyone to work together, it is a fun opportunity to instill an appreciation for the history of our country and the Native American Indians.
Materials Needed:
- Nine 10 foot poles
- (Bamboo poles are best. Check if a neighbor grows bamboo. Optional: 1 inch metal conduit)
- 12′ x 18′ Heavy duty Canvas Dropcloth
- Lightweight cord or rope
- 5 sticks 9 ” long
- 2 sticks 6 ” long
- Scissors
- String
- Garden clippers
- Permanent colored Markers

What to Do:
1. Collect thin, sturdy branches and cut to sizes as shown, using garden clippers. The collecting is a fun activity for the kids. If desired, taper ends slightly by rubbing ends on sidewalk or a piece of sand paper.
2. Lay the canvas dropcloth out flat on the grass. Find the center top of the long end of the cloth, make a mark. Tie a marker onto the end of a string and then, holding marker upright at side top of long end of cloth, stretch string to center point, cutting string. Your string should be 9 feet long. Hold string at center point firmly, while a second person makes a large arc with the marker, denoting cutting line. (the finished cut size equates to the length being twice as long as the width. For example 9 feet wide by 18 feet long)

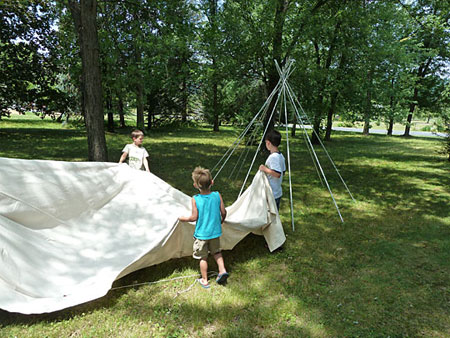
4. Carry teepee cloth to the back of your teepee, assuming you have declared where the front opening will be. If you don’t have a tall husband, like I do, to reach up and place the top center of the cloth near the cross poles, remove the last pole from backside and attach the top center of the cloth about a foot from top. Since this is temporary, you can just make a ring of duct tape and attach inside of cloth to pole.
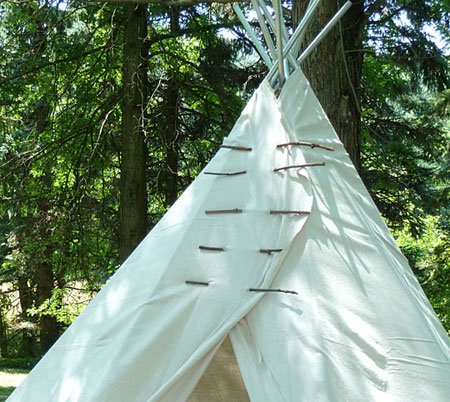
5. Pull sides of cloth around the poles, overlapping at top of teepee front. Make two slits to accomodate each 9 inch stick, making sure cuts go through both pieces of overlapped cloth. Slits should be about 3 to 4 inches apart. Weave a stick into openings, as shown, securing teepee front. Space sticks about 3 to 4 inches apart.
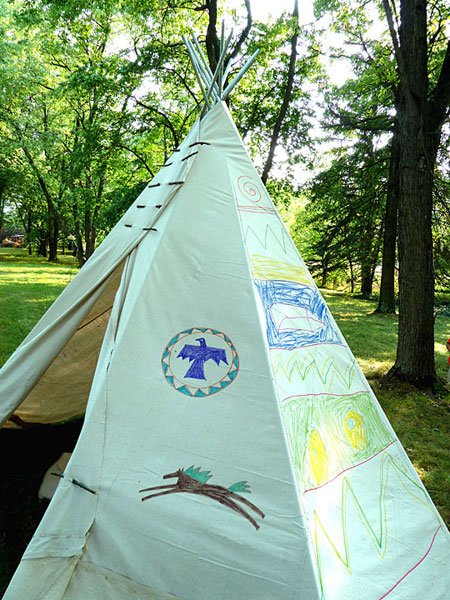
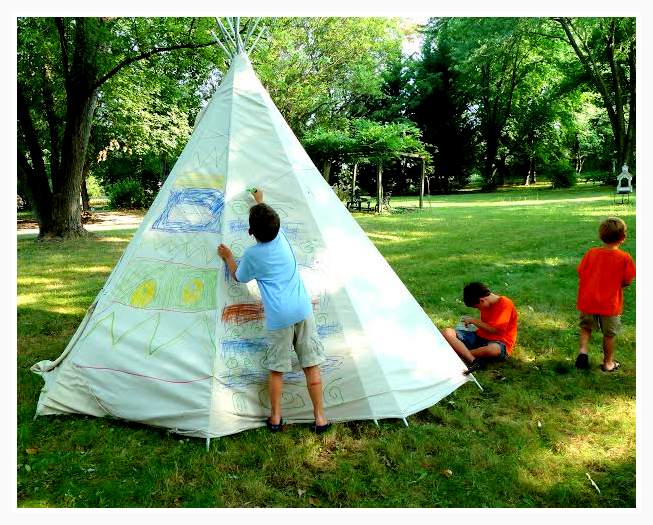
7. Use markers, or paint if desired, to decorate the outside of your teepee. We let the kids decorate however they wanted, after we showed them some American Indian designs. This is a perfect time to teach kids some native American history and the symbolism of native American designs.
It is a special talent to know how to play. Plato
For additional Family craft projects
Sharon Pierce McCullough