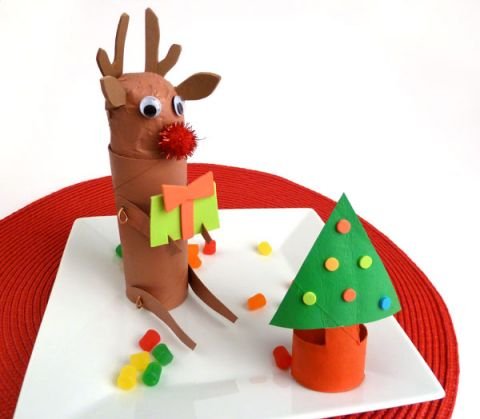
Recycled Christmas Craft Project
This little cardboard reindeer and his holiday tree are the cutest project that kids and adults can make as a holiday or Christmas project. We love the simplicity of this project and it really is easy to make. It’s perfect as a holiday decoration or even to give as a handmade gift.
Need:
- Cardboard paper tube
- Thin cardboard (arms/legs)
- Brown craft foam (ears/antlers)
- Red pom pom
- Wiggly eyes
- Thin copper wire
- Red & green cardstock (or craft foam)
- Paper towel
- Brown paint/ paintbrush
- Scissors
- Craft Glue
- Masking tape
- Needle Nose pliers
- Cotton ball
What To Do:
- Starting with a 6 inch paper tube, tape a rolled up piece of paper towel shaped to make a head and neck to one end of the tube.
- Cut out 2 arms and legs from cardboard, then make a small hole in the upper end of each leg and arm where they will join the body.
- Paint body with head and both sides of arms and legs. Set aside to dry.
- Make a hole in body for each point where arms/legs will be attached. Using needle nose pliers, cut 2 lengths of copper wire, approximately 4 inches long, making a small loop at one end of each wire. Slide one length through an arm, the body and the other arm. Twist other end into loop, making sure the arms are tight to body.
- Cut 2 antlers and 2 ears for reindeer from craft foam, or use cardboard. Glue nose, eyes, antlers and ears in place and let dry.
- Glue cotton ball onto back of body for the tail.
- Cut out a small present from foam or card stock and add a red bow. Make two small cuts at the bottom of thepresent and slide onto the reindeer’s arms.
By Sharon Pierce McCullough for ZiggityZoom.

