
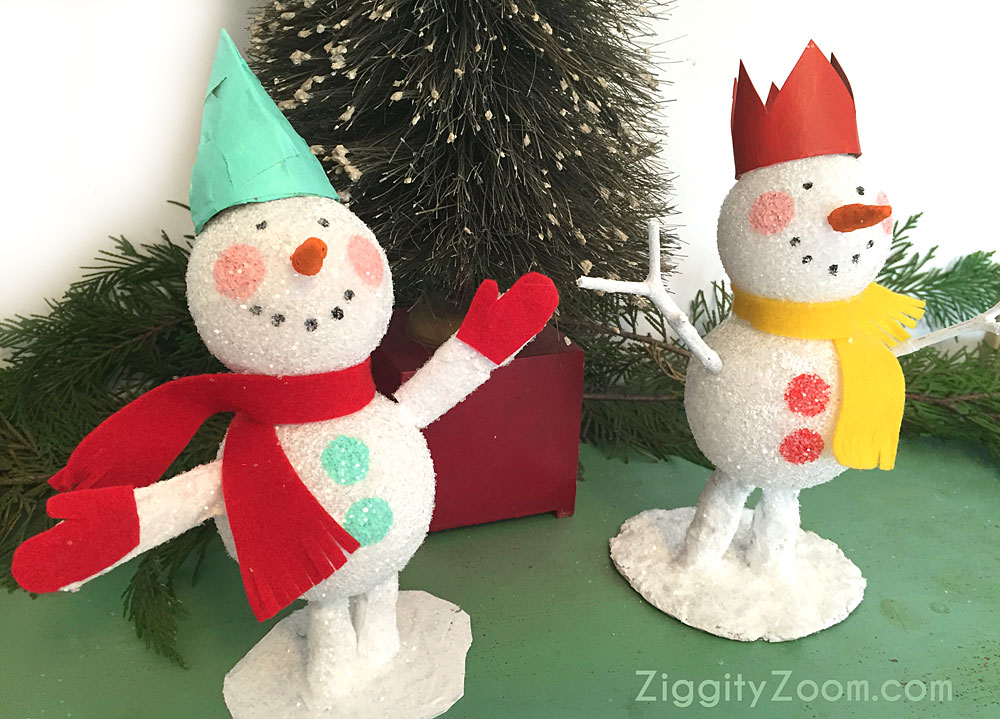
DIY Snowmen
Whether it’s snowing or not, snowmen always make us smile. There is something innately happy about a snowman. Over the years, Kristin and I have posted many a snowman project. We’ve made sock snowmen, pizza snowmen and snowman treats. But this is by far the cutest snowman project so far. Our kids all love glitter and we love the mica look glitter that you can’t get with any other glitter product. And, as always, we try to utilize as many recycled items as possible. Reuse, recycle, less cost.
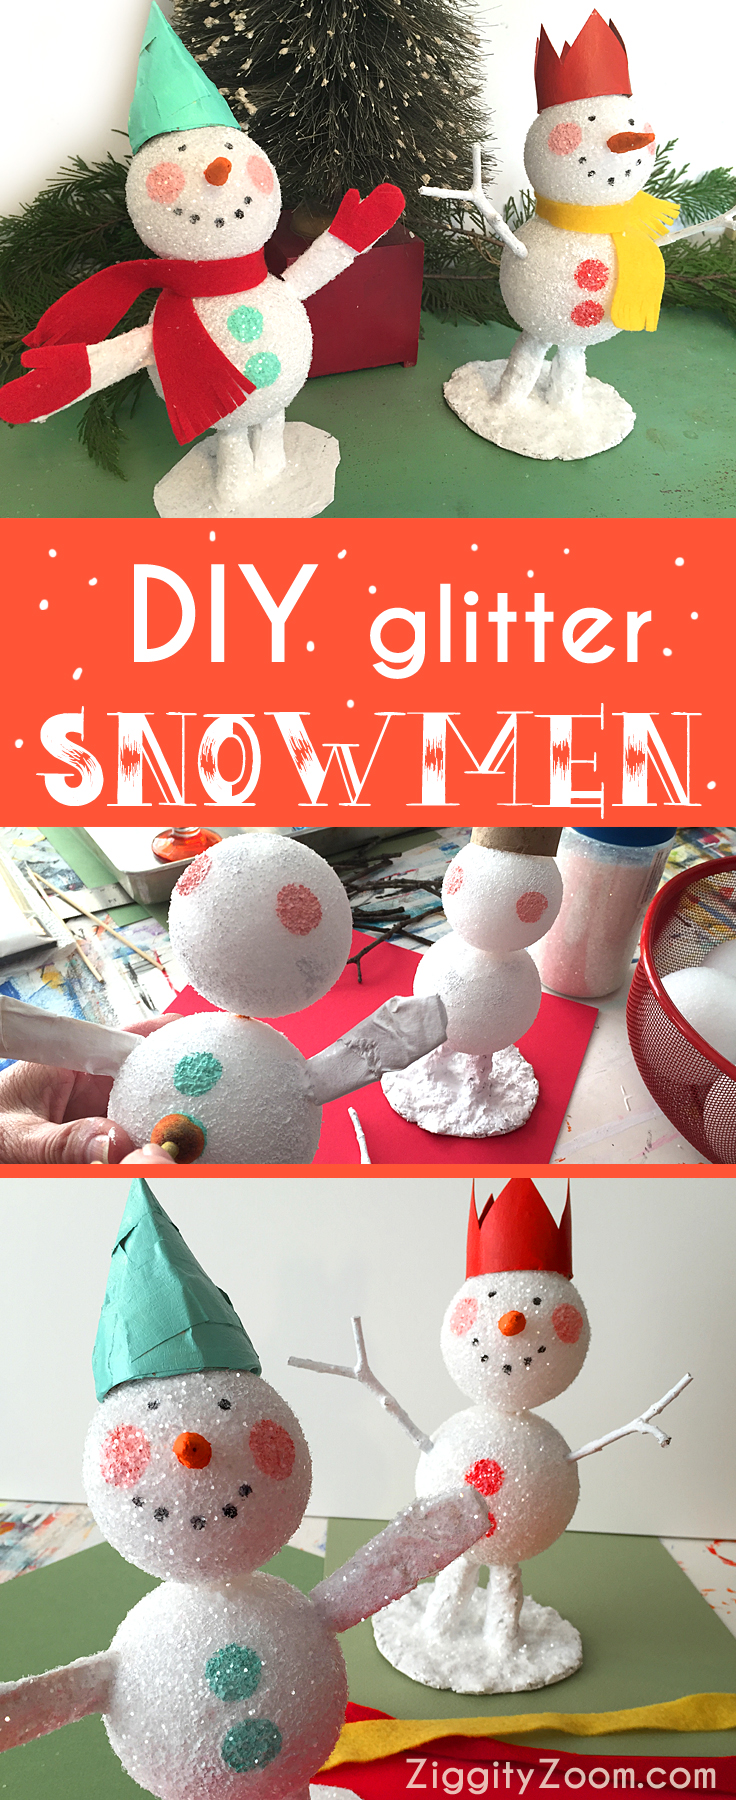
Snowman How To
What You Need:
- Styrofoam balls, 2 sizes
- Plastic lid for base
- Thin wood skewers/sticks
- 1/4″ sticks/ wood dowels
- Felt
- paper towel roll
- Masking tape
- Acrylic paints/brush
- Scissors
- Crystal white Glitter (mica look)
- White glue
- Clear gel medium/ white glue
- Black permanent marker
What to Do:
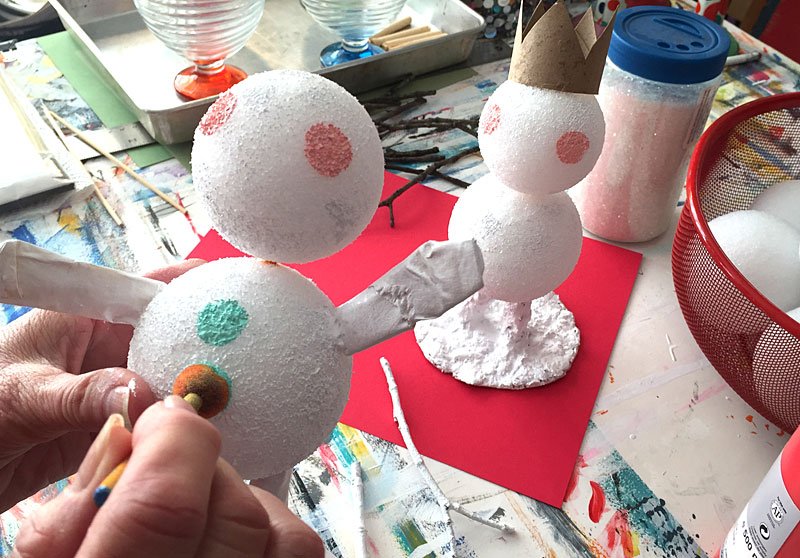
- For each snowman, select two different sized styrofoam balls. You will also need a thin 4″ stick/rod to connect head and body. Add white glue to ends and sides of stick and insert most of the way through each ball, going through the center, not the top and bottom. Let dry. You can also use a hot glue gun for gluing steps if desired.
- Use 2″ sections of 1/4″ diameter sticks or wood dowels for the legs. Attach legs to the plastic lid (or substitute a round piece of cardboard) with masking tape. Then, wrap a bit of paper towel around the bottom 2/3s of the leg, wrapping with masking tape. This doesn’t need to be very thick but it gives a little extra width to the legs.
- Add glue to the tops of legs and insert into the bottom of the snowman body. Let dry.
- For the arms, I tried two different options as you can see in the photo. Choose to use gathered twigs for arms or cut arm/hand from cardstock and tape to a stick, then tape around with masking tape to fill out the arm. If using twigs, you can leave them natural color or paint white for a more contemporary look.
- Add glue to ends of arms and insert into the snowman body. Let dry.
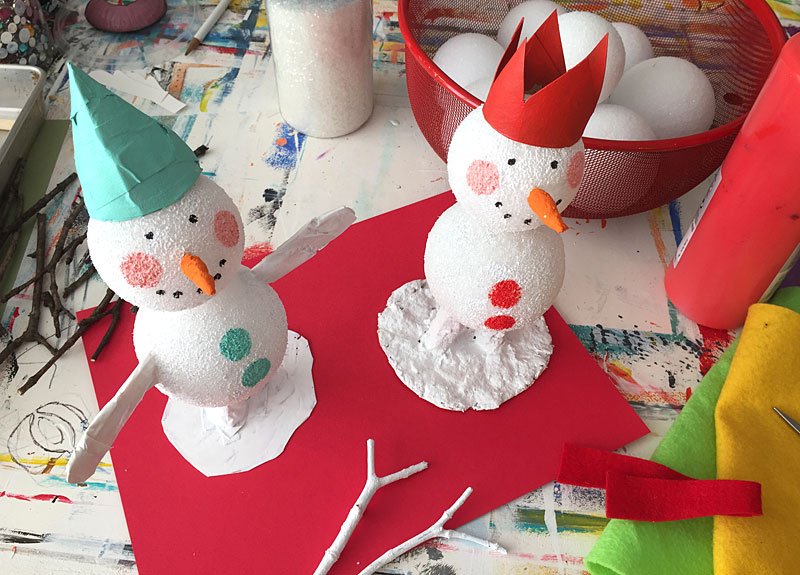
- Paint legs and arms white and set aside. Using either a pencil eraser or a tiny circular sponge, dab on check color and buttons in desired colors.
- Using a toothpick or small twig, cut a one and a half inch piece and then wrap with masking tape or paper clay into a pointed carrot nose shape. Paint orange and set aside.
- Using a black marker, make tiny eyes and marks for the smiling mouth.
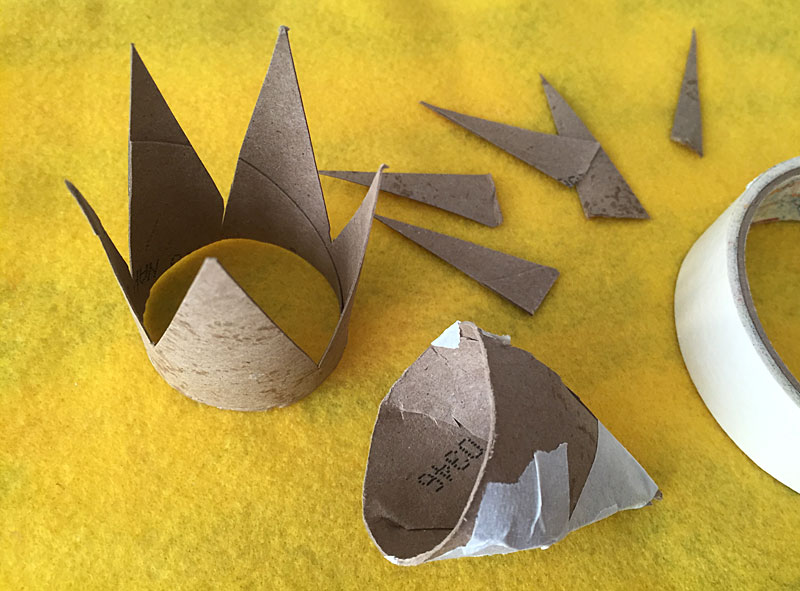
- For the Hat, cut off a 1 1/2″ section of cardboard tube. (Do not make cuts, mentioned next, too deep as you need the hats to stay in one piece.) To make the pointed hat, make 4 cuts, equidistant from one another. Tape into a cone shape. For the crown, make 5 cuts, equidistant from one another. Make two angled cuts from each section. Paint desired color.
- From felt, cut a 10″ strip approximately 3/4″ wide at the ends, narrower in the center area. Fringe ends with scissors. If making the snowman with mittens, cut the mittens to fit the hand and set aside.
- Now the fun begins! Whether you are using white glue or gel medium, put about a 1/4 cup into a bowl and then mix in a slight amount of water. You want to have a thick mixture but you are adding water to make it more paintable. Paint the entire snowman with this mixture, just a light coat.
- Working over a box or cookie pan, sprinkle the white glitter all over your snowman. Set aside to dry. Any left over glitter can be poured back into your container.
- You can also add glitter to the hats/crowns if desired.
- Insert snowman nose and then wrap the scarf around his neck. Glue mittens in place.
- ** I opted to cut off some of my lid base prior to adding glitter. This is a personal decision so either way looks adorable. Enjoy!
* Note that the Snowman with the red crown, has a paper clay added to his legs and ground beneath him. This is an option, depending on the look you prefer.
 Let it Snow ….
By Sharon Pierce McCullough for ZiggityZoom.com