Bunny Craft Project
Springtime makes us think of Easter and Easter conjures up fun and happy images of bunnies and flowers. Don’t you just love the sights and smells of spring? One of my most favorite sightings is when the daffodils and crocuses start peeking through the ground.
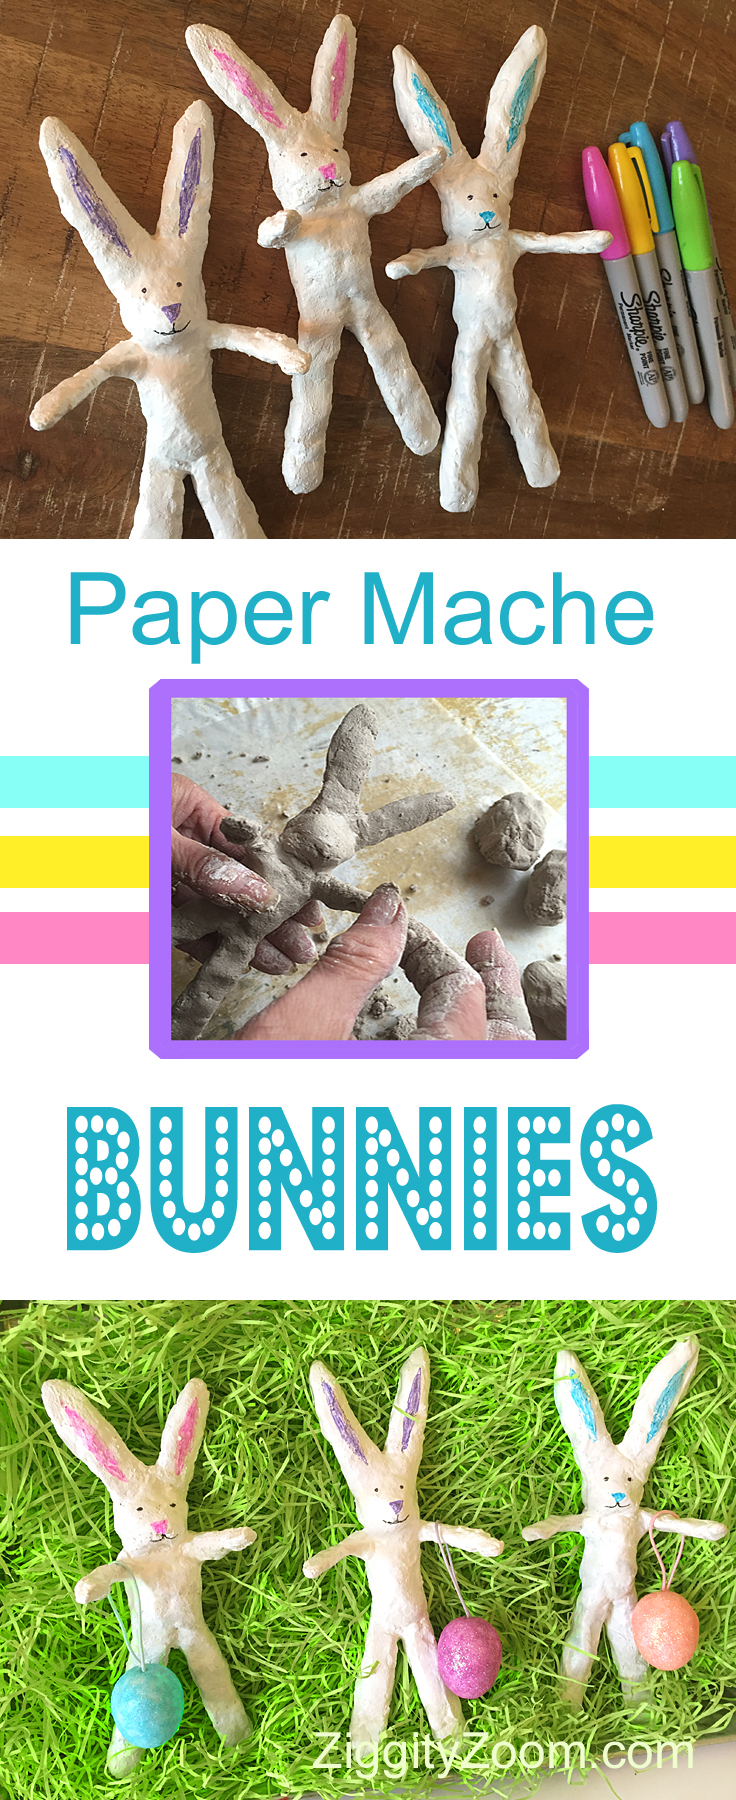
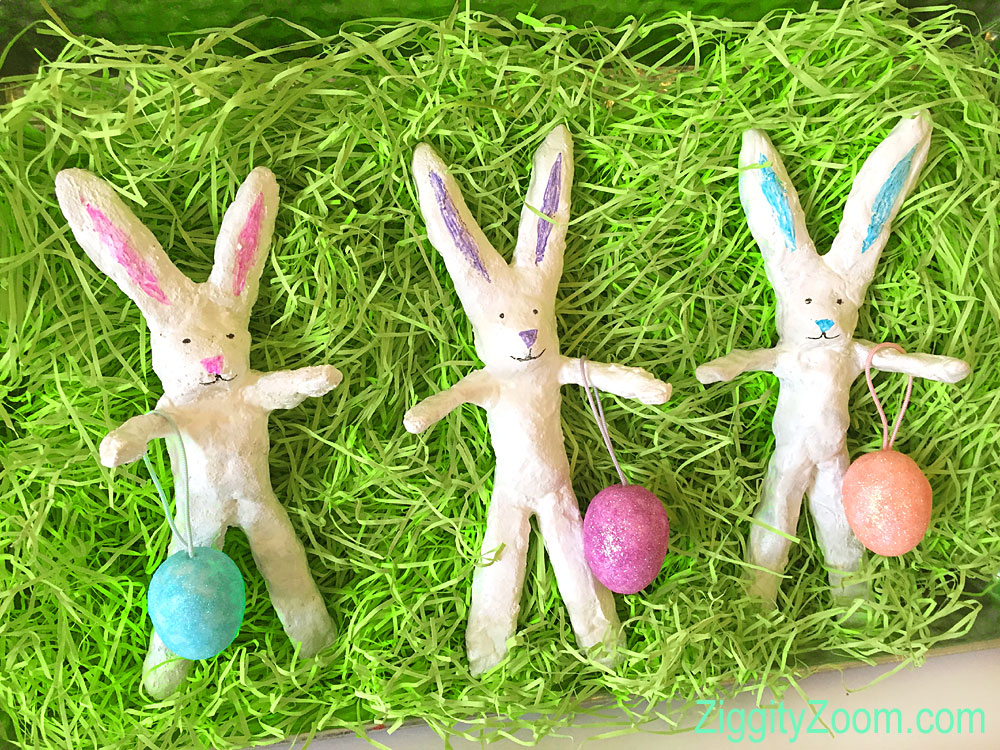
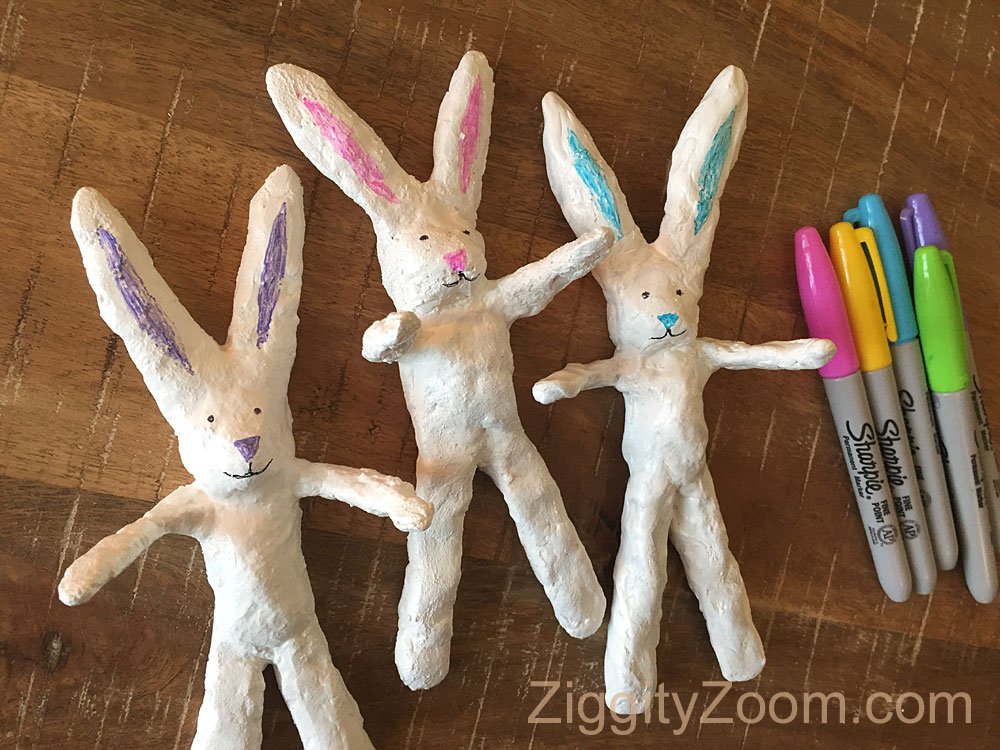
We love bunnies of all shapes and sizes, so we are super excited to offer you a fun, new bunny craft project. This is a project that is simple enough for the whole family, so everyone can make their own bunny. And what could be sweeter than giving one of these little bunnies to friends and neighbors, tucked into an Easter basket with goodies.
We are happy to introduce you to a new product we have just tried for this project. It’s a great, all purpose paper mache that is easy to work with from Aves Studio. It’s actually a fine paper mache powder that you only need mix with water.
What You Need:
- Aves Paper Mache (or similar)
- Plastic knives
- 18 gauge stainless steel wire
- Needlenose pliers
- Masking tape
- White paint (optional)
- Pastel permanent markers
- Black permanent marker
What to Do:
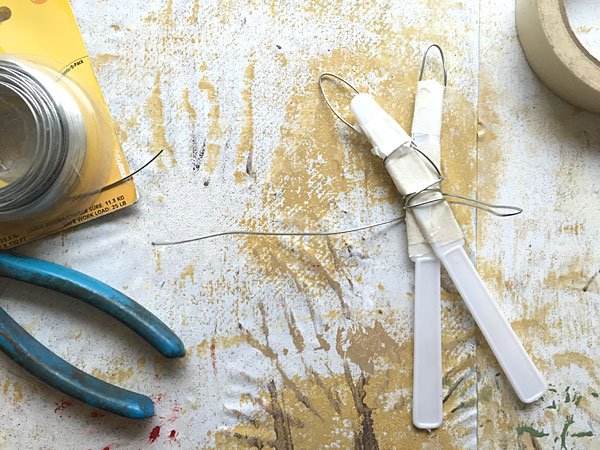
- For each rabbit, you will need two plastic knives. Cross over the knives, forming a set of ears at the top.
- Using the needlenose pliers, cut a piece of wire approximately 16 inches long.
- Leaving about a 4 inch tail, start wrapping the wire around the crossed section and then form longer ears, wrapping around center area again and then form arms. Double the wire at the arms as shown. You might have to try a practice wrap before starting your first bunny.
- Tape around center area and the wire ears and arms. This will give additional support and give more area for the paper mache to grab onto.
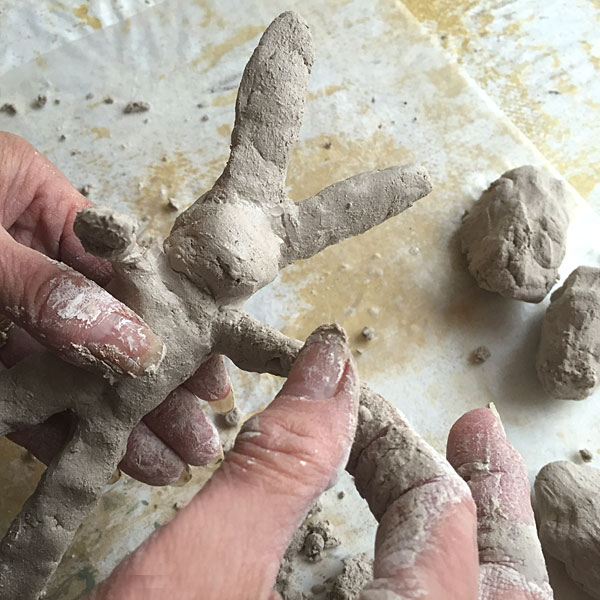
- Measure the dry paper mache powder and mix with water to desired consistency. Suggested proportion is 3 parts powder to 1 part water.
- We like to use the white, as is, color and paint after it cures but you can, optionally, add some food coloring at this point.
- Using your hands, add small amounts to your form, pressing and shaping as you add the mache. We worked from front to back, since we wanted the front of our bunnies to look their very best.
- Once you are satisfied with your bunny, set him aside to dry on a piece of waxed paper. It will take from 1 to 4 day for the curing to be complete, depending on temperatures and humidity.
- When your bunny is completely dry, he can be painted or left a natural white color. For ease of using markers, we painted over the mache with white acrylic paint.
- Make all details, eyes, nose, mouth, ears, with marker.
Check out Aves Studio for other great products, including Apoxie Sculpt and Apoxie Clay. These are the types of non-toxic products that we prefer to work with for use at home and in the classroom.
Note: We were supplied with a sample of this product for our creative testing.