
 Painting with Batik
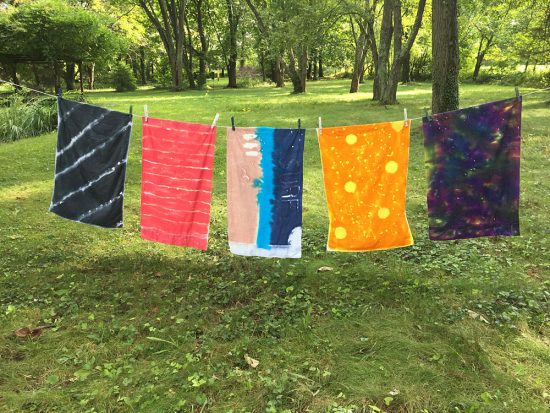
We are always looking for fun pillowcases, but they seem to be few and far between. So, when the cousins got together last summer, we broke out the wax and made original, batik pillowcases. It’s a fun DIY craft project that anyone over the age of eight can do and a fun pillowcase that can actually be used.
It’s a pretty straight-forward craft but it does take a little bit of time. We started with plain, white pillowcases, which were first washed. Next, we purchased the needed supplies at a craft store. Almost any craft store will have everything needed to make these fun, unique pillowcases. And the supplies can all be ordered online if need be. They are so perfect for kids bedrooms and really fun to take to sleepovers. No chance of mixing up pillows either.
 Supplies Needed to Batik
- Cotton pillowcases, preferably white or pastel
- Wax, 50% beeswax, 50% parafin
- Fabric dyes
- Brushes
- Electric griddle
- Small metal containers (repurposed tuna cans are good)
- Reynolds wrap
- Cardboard for pillowcase insert
- cardboard
- newspaper/ brown paper
- iron/ ironing board
Mix and match colors for fun effects. You can do Batik for fun tshirt projects, tote bags and more.
How to Make Your Batik Pillowcase
- Wash and dry the pillowcase.
- Set up a workspace, covered with something like a flannel-backed vinyl tablecloth. (we use the same one over and over for all projects)
- Cut a piece of cardboard that will fit inside of your pillowcase. This will ensure that the melted wax doesn’t seep to the other side of the pillowcase.
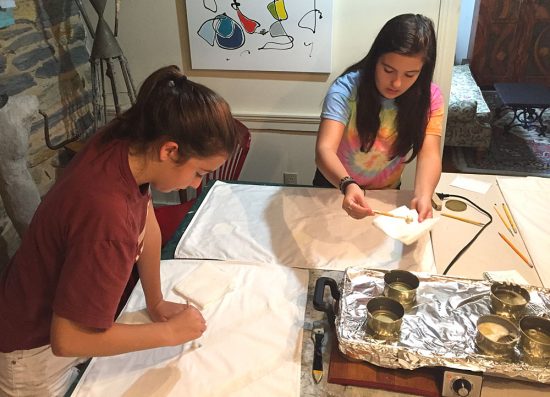
- Depending on space, you can either put your electric griddle in the center of your table or on a counter. Put a sheet of reynolds wrap on the griddle to protect from wax.
- Put some of each type wax into the small cans, so that they will only be about half full. Set cans on griddle to melt the wax. Keep the temperature set so that the wax is only staying warm, not hot.
- Using brushes, dip into wax and paint designs on pillowcase.
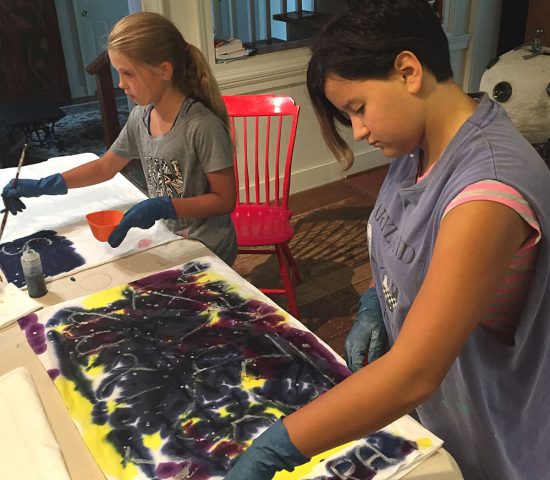
- Mix a fabric dye of desired color, then, using different brushes, paint onto pillowcase. You can do only one color or mix and match.
- Repeat wax brushing if another color is desired, then dye with a darker color.
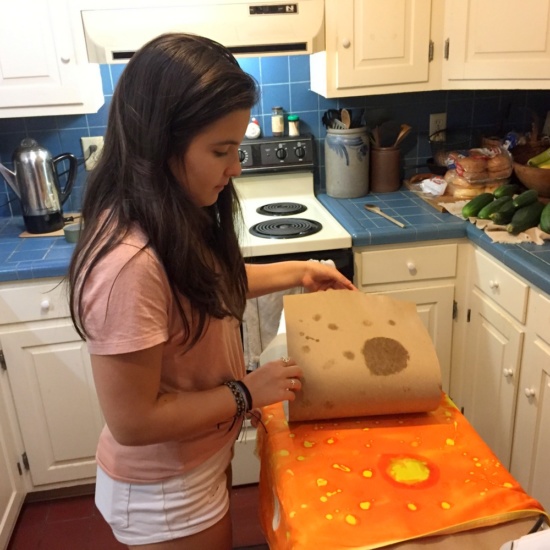
- When finished with your final design, and pillowcase is dry, place newspaper or brown paper on ironing board and inside of pillowcase.
- Now, iron over entire pillowcase, changing out paper a few times to absorb all of the wax. Medium heat.
- Pillowcases can now be washed in cold water with the addition of a 1/2 cup of vinegar to set the colors. Enjoy!
By Sharon Pierce McCullough for ZiggityZoom.