Neighborhood Leaf Walk
Late summer, early fall is the perfect time to plan a leaf walk with the family. Now that more kids are doing schooling from home, it is an ideal activity to learn more about nature. It’s also fun to get some fresh air while collecting the many colorful leaves that are starting to fall. You will be amazed at the number of different trees growing in just a small area, like your own neighborhood.
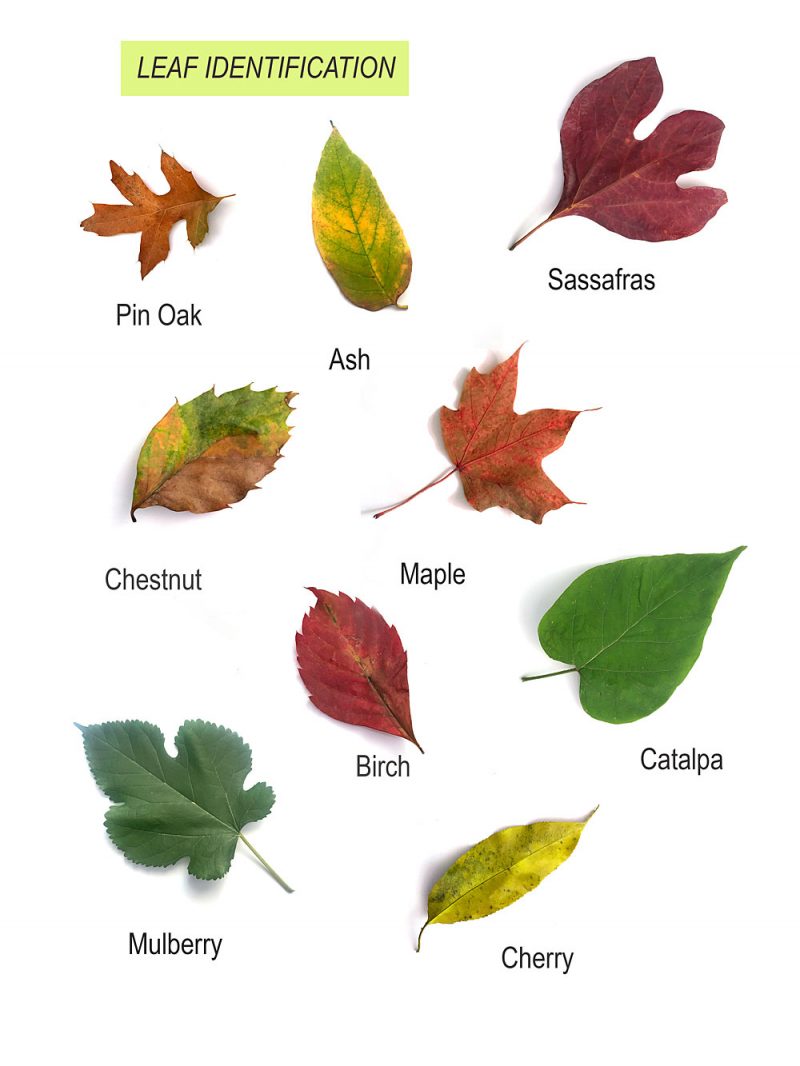
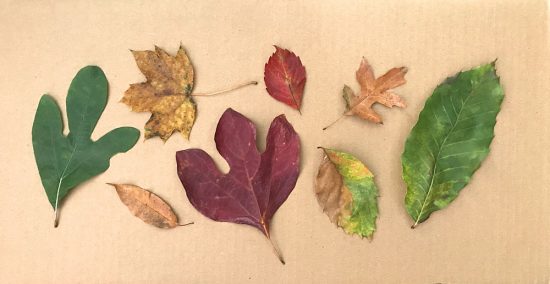
Just today we found leaves from ash, birch, maple, chestnut, sassafras, cherry, mulberry, oak and catalpa trees. It is quite a learning experience for both adults and children when you identify leaves that you haven’t previously encountered. We are photographing each leaf and hoping to find a few more varieties, like those from a tulip poplar or a ginko tree. There are many, many projects and crafts that you can do with leaves.
Leaf Project Ideas
Leaf Identification Sheet
The first thing we suggest is taking photos of your leaves. This is important if you are not going to press your leaves. As they dry, they will start to curl and crumble. And another suggestion is to place stacked leaves between damp paper towels to keep them from drying out immediately. You will also want to identify each leaf either using our own leaf identification sheet or by searching leaves on the internet. You can then either print the photos of your leaves or draw the shapes on a piece of paper, then write the name of the tree that the leaf fell from. You can choose to either draw a number of leaves on each sheet of paper or make individual pages for each leaf, which you can then hook together.
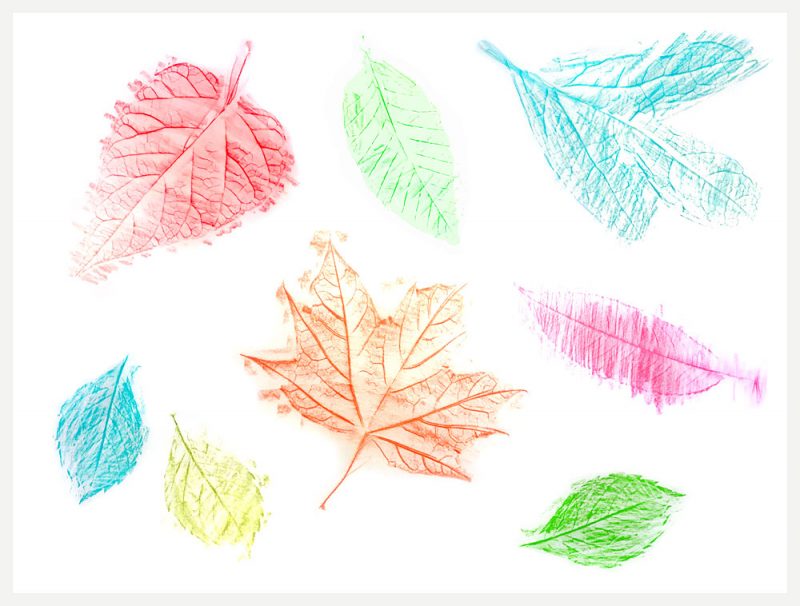
Leaf Rubbings
Leaf rubbings should be done right after collecting your leaves so they don’t dry out first. You will need a white sheet of paper and either a pencil or crayons. We made our leaf rubbings with colored pencil and crayons. Two projects you can do with leaf rubbings is to make cards to send to friends and family or fun placemats that you can laminate. In order to make the cards, cut a sheet of paper either 6″ x 8″ for a finished card of 4″ x 6″ OR paper that is 5″ x 10″ for a 5″ x 5″ card. Fold your paper in half, lengthwise, then unfold to do your rubbing on just one side of the card. You might want to see what size envelopes you have on hand first, before choosing your size. Smaller leaves will work best.
Laminated Leaf ID Book
After collecting your leaves, keeping in mind that finding smaller leaves might work best, cut some sheets of paper to either 5″x5″ or 6″ x 6″. Card stock works best or construction paper. Cut laminating pages into 6 inch squares or 7 inch squares, depending on the size paper you are working with. You want the laminate to have 1/2″ extra around each side to seal securely.
Set one leaf on each paper square, write the name and then seal with 2 pieces of laminate. Punch a hole in the corner of each finished page, then hook together with a metal ring. This way you can continually add to your Leaf ID book as you find new leaves.
Pressed Leaves
Once you collect leaves, or even small flowers, you can preserve them by putting them in a heavy book to act as a press. Set each leaf on a different page and then check back after a few weeks. Your leaves will be beautifully preserved.
Laminated Leaf Placemat
Following the same procedure as above for Leaf Rubbings, use just one sheet of paper to make rubbings of many leaves. This works best with leaves that aren’t too large. Once you like your composition, just laminate the sheet for use as a fun fall placemat.