
Sometimes we all need a bit of fun. Kids especially are looking for fun things and to keep them busy sometimes we have to conjure up the fun ourselves. To help in this endeavor, we have gathered a bunch of Craft Recipes that you can make at a moment’s notice. Fun that you can create right in your own kitchen and the kids get to help. No need to rush out to the store, and most of these things you probably already have right in your own kitchen. So, get crafty with these fun homemade recipes.
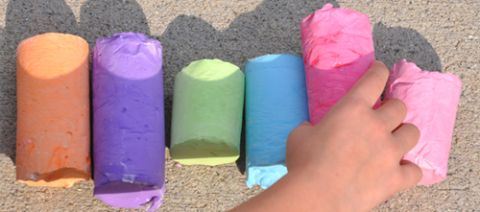
Giant Sidewalk Chalk Recipe
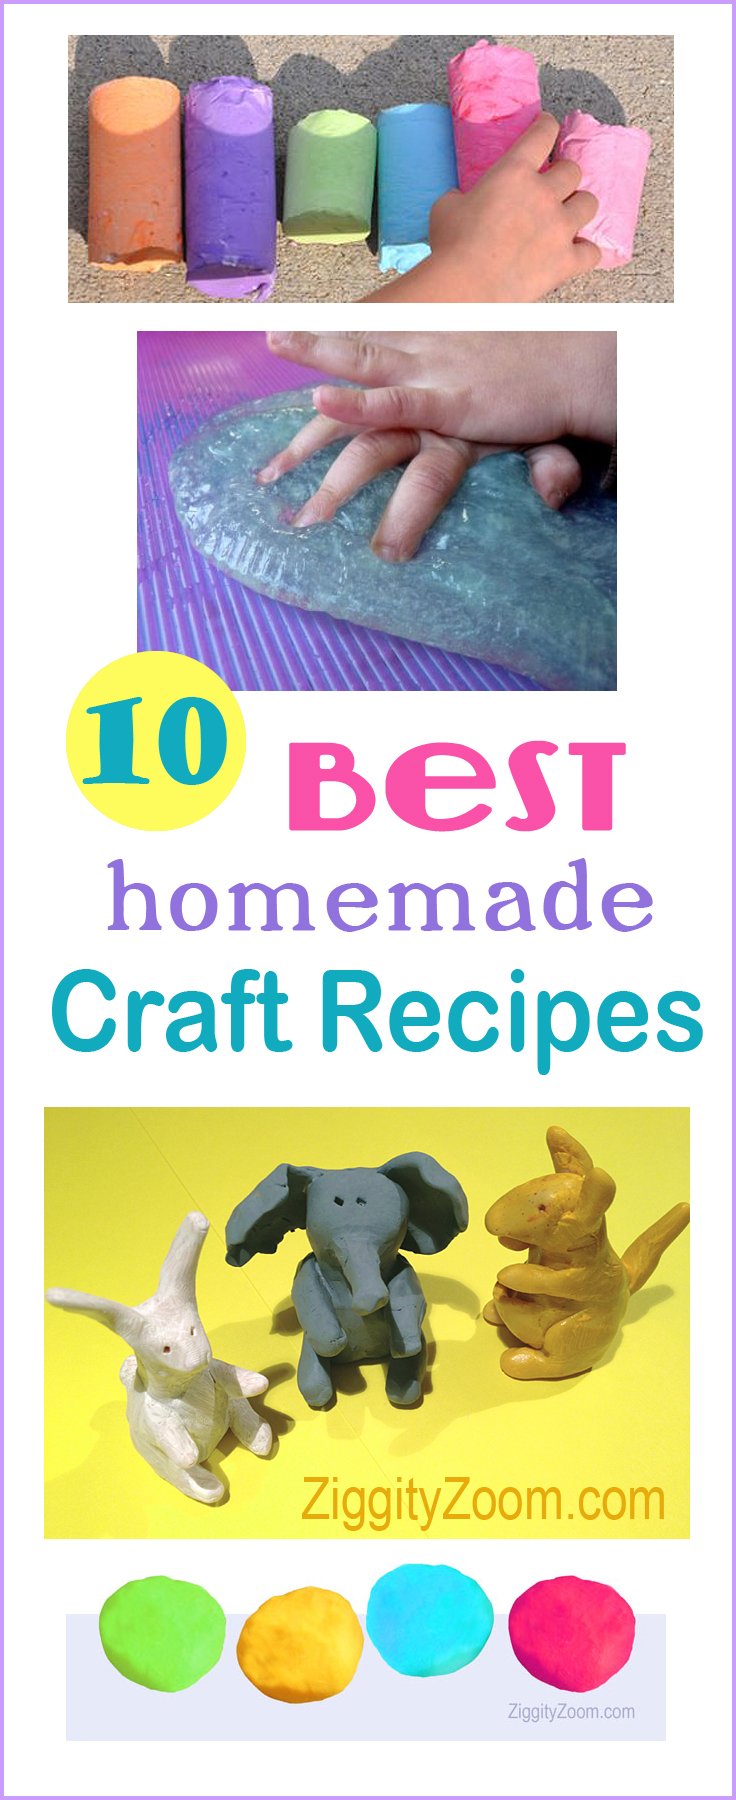
Kids love playing with chalk and here is a great recipe that the kids can even help to make. Your little artists will be delighted that they have helped to make this fun and colorful art material and then they can go be sidewalk artists to their heart’s content! From OhMyHandmade
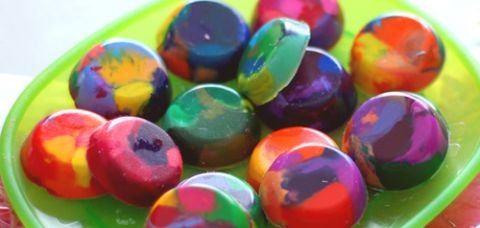
Fun Crayon Recipe
If you have lots of broken crayons and crayons without their little wrappers, you will love this project. Now there is no need to toss the little broken crayons when you can make these fun and colorful crayons at home. Even coloring with these crayons is such a joy as the color is always changing. A great tool for any little artist. From Suenos Encantados
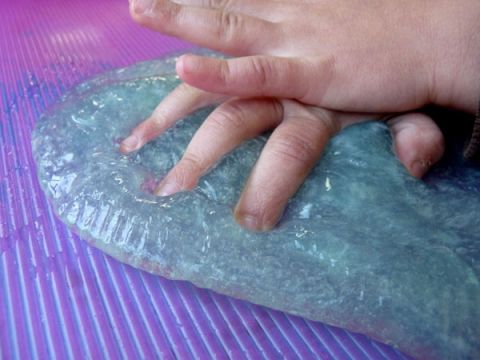
Make Moonsand
This is a super easy recipe that is sure to provide lots of fun hours of play. And the best part is you can make it any color you want. Moonsand recipe.
Who doesn’t love sand? It’s amazing how we can all revert back to kids once we get our hands in the sand. And we have all played with this stuff in toy stores. Admit it … it was fun wasn’t it?
To make your own Moonsand at home, you just need a few ingredients. We actually have several fun recipes to share. The one with play sand is geared more towards outdoor play. The other recipes are best for indoor play. All are fun options!
Moonsand Recipe #1
What you Need:
- 1 cup Baking Soda
- 1 cup Corn Starch
- 3/4 cup Baby Oil
What to Do:
- Mix cornstarch and baking soda into a bowl.
- Add oil, a little at a time, while stirring to mix together.
- Test mixture as you go, as you are aiming for a nice moldable clay. If you want more squish, add a tiny bit more oil.
- Play!
Moonsand Recipe #2
What You Need:
- 1 cup all purpose or GF Flour
- 2 Tbsp. Baby Oil
What to Do:
- Mix flour and baby oil.
- If needed, mix in tiny amounts of the oil to get a nice moon sand mixture. You want the sand to take form when pressed and still crumble apart to keep playing with.
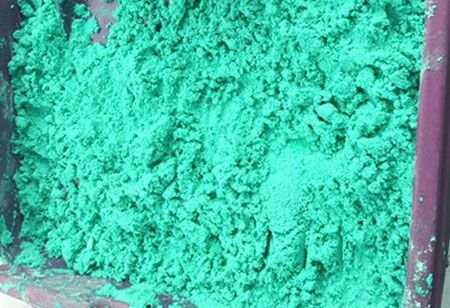
Moonsand Recipe #3
What you Need:
- 2 cups Corn starch
- 4 cups Play sand
- 1 cup water
- 2 Tbsp. colored powder paint
What to Do:
- Mix the sand and cornstarch together first until blended.
- Add powdered paint and mix.
- Mix in water a bit at a time, until all particles are damp. If your mixture feels too crumbly, add a tiny bit more water. You want a damp sand, but not watery.
- Store in a covered plastic container.
DIY Slime
Ooey, gooey slime. Boys and girls both love playing with this mixture. Of course, I think boys out number the girls in wanting to play around with slime, or goo as some people refer to it.
It’s super simple to make in your kitchen and the kids can help. All you need are two main ingredients and some food coloring. We love a clear kind of look, so we don’t add too much food coloring.
Ingredients for Making Slime:
- 1 cup clear glue
- 1 cup liquid starch
- Food coloring
Mix glue and starch together well. You can divide into 3 or 4 clumps and then add a different color food coloring to each, if desired. Or add food coloring to the whole shebang and let the kids play with one color goo.
It’s really fun … it stretches and sticks together for some slimy fun. When finished playing, just store in a closed container for another day.

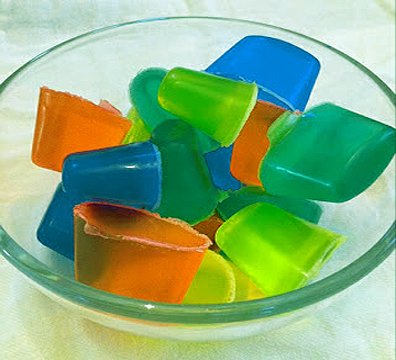
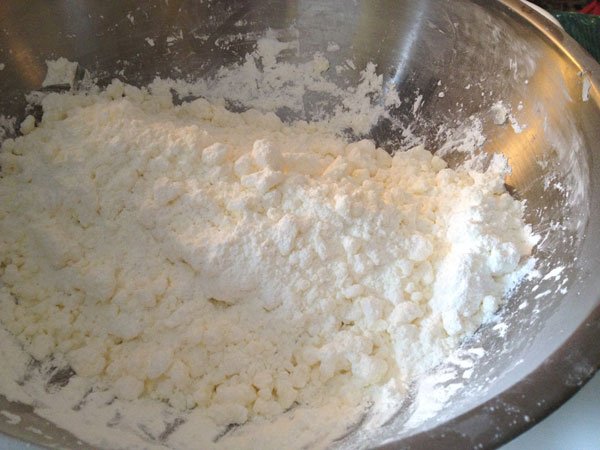
DIY Playdough
Kids of all ages enjoy playing with clay. One of the first versions of clay that little ones get to try is Playdough, which can get expensive as they go through pack after pack. This DIY play clay recipe is perfect for making the colors you want and making it in quantities. It stores for a long time as long as it is closed into a tight little container or ziplock bag.
What You Need:
- 1 cup Flour
- 2 tsp. Cream of Tartar
- 1/3 cup Salt
- 1 tsp. Vegetable Oil
- 1 cup Water
- Food Coloring
In a medium to large pan, mix the flour, cream of tartar and slat together. Add water and oil, while stirring over low/ medium heat. All stoves are a bit different, so your process might go quite quickly compared to another person’s stove. The entire process just takes a few minutes. You can mix up a few different batches of different colors in a short period of time.
Stir mixture until it starts to thicken and then mix in a few drops of food coloring. Keep stirring until the dough begins to pull away from the sides of the pan. Remove from pan and set on a coated paper plate or wax paper. Let cool and then knead a bit to remove any lumps for a smoother clay.
Store clay in small closed containers or ziplock bags. If clay starts to dry out, you can revive it by kneading in a few drops of water.

Homemade Spray Paint
Looking for a little fun that you can take outdoors? Why not make this homemade spray paint. Just wash and rinse some spray bottles, add a bit of non-toxic paint and dilute with water. For use on paper, don’t make the solution too watery. For outdoor use, add more water so your child can have fun “painting” but the paint will wash away.
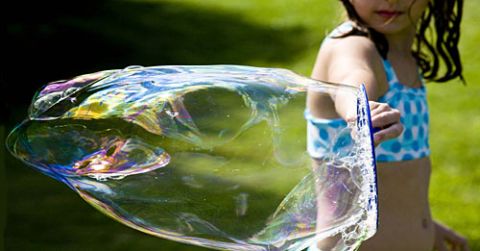
Giant Bubble Recipe
Kids are always wanting to blow bubbles and so will you with this giant bubble recipe and tutorial right here on ZiggityZoom. The kids love these and it is a fun activity when the kids get bored. Here is the recipe for Gigantic Bubbles Recipe
Items needed:
- Plastic Straws
- Cotton String
- Liquid Dishwashing Soap
- Liquid Glycerin (found at Walmart with first aid creams or hand creams/ or crafts stores with cake decorating supplies)
- Water
- Pan / container (such as a 9×13 inch Cake pan)
Instructions:
- Mix together:
- 1/2 cup Dishwashing Soap
- 1/2 cup Glycerin
- 4 1/2 cups Water
- Mix bubble solution and set aside. The longer the solution sets, the better the bubbles.
- For each bubble blower, cut two straws to a 6 inch length. Cut a 36 in. piece of string and thread through both straw pieces. Tie end and then slide end into the middle of one of the straws. You can adjust the blower size by making the length of string shorter or longer before tying ends.
- Pour Bubble solution into a low, wide container and then, holding the blower by both straw sections, dip the blower into the solution, keeping string taut. String needs to be completely soaked before the giant bubbles form.
- Remove blower from solution carefully and then, holding the blower sideways, move the blower to the right or left, pulling through the air.
- Leftover solution can be kept in a jar and used for another day.
Hints: Blow bubbles on days that are not windy and for the biggest, best bubbles, blow on a slightly humid day.
Bath Crayons
Kids always love to play in the bath and here’s a fun activity to encourage extra bathtime. Make fun colorful bath crayons to keep in the bathroom.
To Make:
- Glycerin soap
- Food coloring
- Mold/ice cube tray
Just melt the glycerin soap in the microwave. This item can be purchased at any craft store. Add some food coloring, which can be added and mixed in small paper cups if you are making several colors. Pour mixture into a small mold or ice cube trays work well. Let mixture cool and solidify completely. Pop out of the molds. Keep in a container in the bathroom for spontaneous playtime. A kid favorite!
DIY Snow
Since this snow is made using oil, it will not dry out and you can reuse if desired. We put some of our excess snowballs in plastic bags for future fun.
What you will Need:
- 4 -1 lb.boxes of cornstarch
- 3.5 cups of vegetable oil
- large bowl
- large spoon
- twigs for arms
- gravel for eyes, etc.
- carrot piece for nose
- ribbon for scarf (optional)
What to Do:
- Slowly pour the cornstarch into the large bowl. Add about 2 cups of oil and mix slowly with a spoon. Add remaining oil and blend, then mix with hands to get a well-blended mixture.
- Make three different size snowballs by compressing the “snow” in your two hands. It sort of crunches together. You can get two medium snowmen from this mixture, plus a little bit of extra snow left over for a display if desired.
- Press the medium ball onto the top of the largest snowball, then add the small snowball for the head.
- For eyes, mouth, etc. just press the pieces of gravel into the snow. It works just like a real snowman!
- ** Wash hands well with soap and water after playing in the snow … since it has oil, you don’t want oily little fingerprints around the house.
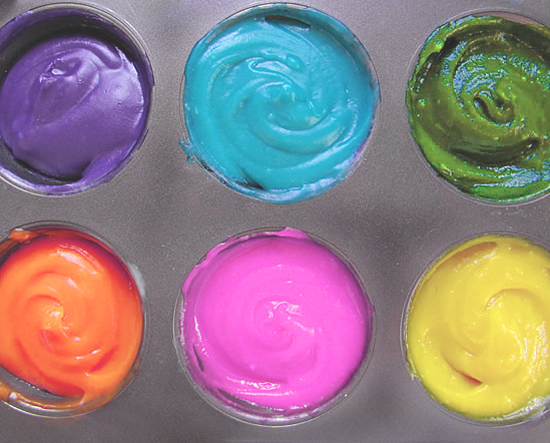
Homemade Fingerpaint
Finer paint works on any paper but we find that freezer paper is the best for little wiggly hands. Lots of time to move the paint around. It’s easy to make fingerpaint and you can store the excess in small closed containers.
What You Need:
- 2 cups Flour
- 2 tsp. Salt
- 4.5 cups Water
- Food coloring
Mix salt and water in a large pot and heat on stove to medium. Once hot, add flour a little at a time, whisking continually to avoid lumps. When the mixture begins to thicken, turn your heat to low and continue to stir until you have a nice cream consistency. Pour into sections of a small muffin pan. Add a couple drops of either liquid or gel food coloring and stir well. Let cool. Paint on paper or, ideally, freezer paper.
Save